|
Electronic Components Datasheet Search |
|
|
Electronic Components Datasheet Search |
|
3G5A2-RPT01-E Datasheet(PDF) 85 Page - Omron Electronics LLC |
|
|
|||||||||||||||||||||||||||||
3G5A2-RPT01-E Datasheet(HTML) 85 Page - Omron Electronics LLC |
|
|
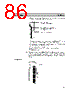
85 / 182 page  72 4-3 Output Unit Fuses The following Output Units have one fuse each as shown in the table. Output Unit Fuse specifications C500-OD411 C500-OD217 C500-OA223 250 V, 5 A C500-OA121 C500-OA222 C500-OA226 250 V, 5 A C500-OD219 250 V, 10 A To replace a fuse in an Output Unit, perform the following steps. 1, 2, 3... 1. Turn off the power to the PC. 2. Detach the terminal block from the Output Unit by removing the screws lo- cated at the top and bottom of the terminal block. Mounting screws Located at the top and bottom. Terminal block mounting screws Located at the top and bottom of the terminal block. Cover mounting screws (8) 3. Remove the screws that mount the Output Unit to the Backplane. Pulling the Unit toward you, remove the Output Unit from the Backplane. 4. There are eight screws on each side of the Output Unit. Remove these screws to detach the case from the cover. 5. Pull out the printed circuit board. 6. Insert a new fuse. 7. Reassemble the Unit. 4-4 Output Unit Relays To replace a Relay in an Output Unit, take the following steps. 1, 2, 3... 1. Turn off the power to the PC. Output Unit Relays Section 4-4 |
|
Link URL |
| Does ALLDATASHEET help your business so far? [ DONATE ] |
About Alldatasheet | Advertisement | Contact us | Privacy Policy | Link to Datasheet | Link Exchange | Manufacturer List All Rights Reserved©Alldatasheet.com |
| Russian : Alldatasheetru.com | Korean : Alldatasheet.co.kr | Spanish : Alldatasheet.es | French : Alldatasheet.fr | Italian : Alldatasheetit.com Portuguese : Alldatasheetpt.com | Polish : Alldatasheet.pl | Vietnamese : Alldatasheet.vn Indian : Alldatasheet.in | Mexican : Alldatasheet.com.mx | British : Alldatasheet.co.uk | New Zealand : Alldatasheet.co.nz |
|
Family Site : ic2ic.com |
icmetro.com |
 New Zealand ▼
 English
 Chinese
 German
 Japanese
 Russian
 Korean
 Spanish
 French
 Italian
 Portuguese
 Polish
 Vietnamese
 Indian
 Mexican
 British
 New Zealand