 |
Electronic Components Datasheet Search |
|
|
Electronic Components Datasheet Search |
|
301201 Datasheet(PDF) 4 Page - Tyco Electronics |
|
|
|||||||||||||||||||||||||||||
301201 Datasheet(HTML) 4 Page - Tyco Electronics |
|
|
4 / 9 page 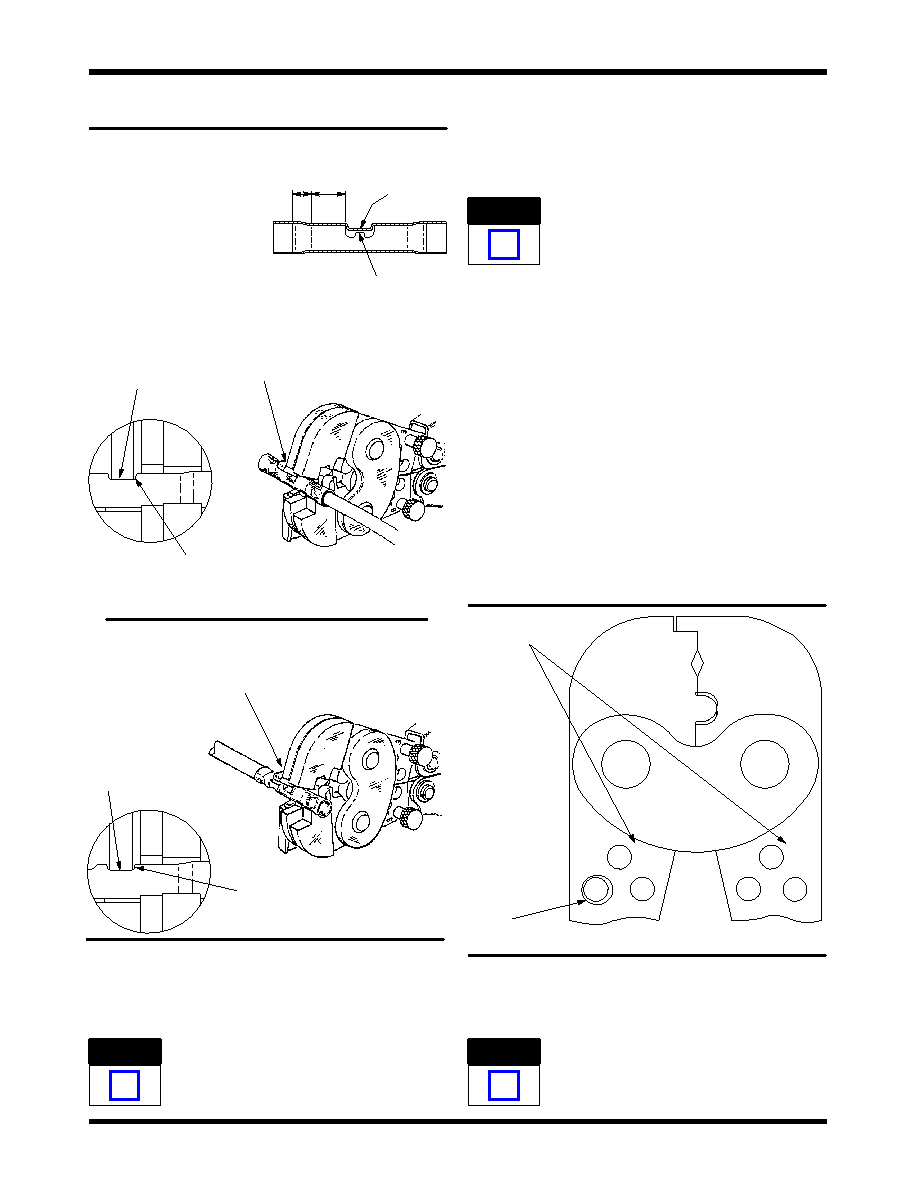 408- 10029 PIDG and PLASTI- GRIP Terminal and Splice Crimping Heads Rev B 4 of 9 Tyco Electronics Corporation 7. Refer to Section 5 and Figure 6 for crimp inspection. Figure 4 PIDG Butt Splice “C” “B” Window Indent Splice Wire Stop Locator Window Indent Faces Indenter and Slides Under Locator Window Indent on Splice Slides Under Locator Locator End of Conductor Butts Against Splice Wire Stop End of Conductor Butts Against Splice Wire Stop “B” Equals Wire Barrel “C” Equals Insulation Barrel (A) First Crimp (B) Second Crimp 4A 4B 4.3. Insulation Crimp Adjustment A. PIDG Terminals and Splices PIDG terminals and splices contain a wire insulation “grip.” The insulation crimping section of the crimping head has three positions: 1—Tight; 2—Medium; and 3—Loose. 1. Insert insulation adjustment pins in Position 3. SeeFigure5. Always place both adjustment pins in the same position. See Figure 5. 2. Place terminal or splice in crimping jaws, as shown in Figures 3 and 4. 3. Insert unstripped wire only into the insulation barrel of the terminal or splice. See Figures 3 and 4. 4. Crimp terminal or splice as described in Paragraph 4.1 or 4.2. 5. Remove terminal or splice. Bend wire forward and then backward. The terminal or splice should retain its grip on the wire. If the wire pulls out, reposition the insulation adjustment pins in the next tighter position and repeat crimping procedure. 6. Repeat adjustment as necessary until desired insulation grip is obtained. DO NOT use a tighter setting than required. Figure 5 Insulation Adjustment Pin(s) (Ref) Positions 11 22 33 B. PLASTI- GRIP Terminals PLASTI--GRIP terminals contain only a wire insulation “support”. NOTE i NOTE i NOTE i |
|
|
Link URL |
| Does ALLDATASHEET help your business so far? [ DONATE ] |
About Alldatasheet | Advertisement | Contact us | Privacy Policy | Link to Datasheet | Link Exchange | Manufacturer List All Rights Reserved©Alldatasheet.com |
| Russian : Alldatasheetru.com | Korean : Alldatasheet.co.kr | Spanish : Alldatasheet.es | French : Alldatasheet.fr | Italian : Alldatasheetit.com Portuguese : Alldatasheetpt.com | Polish : Alldatasheet.pl | Vietnamese : Alldatasheet.vn Indian : Alldatasheet.in | Mexican : Alldatasheet.com.mx | British : Alldatasheet.co.uk | New Zealand : Alldatasheet.co.nz |
|
Family Site : ic2ic.com |
icmetro.com |
 New Zealand ▼
 English
 Chinese
 German
 Japanese
 Russian
 Korean
 Spanish
 French
 Italian
 Portuguese
 Polish
 Vietnamese
 Indian
 Mexican
 British
 New Zealand


